
There’s something timeless about denim and leather together.
A pair of jeans with a leather logo patch.
A rugged denim jacket with a branded detail.
A cap finished with a stitched leather badge.
It looks premium. Durable. Professional. But the moment you try sewing that leather patch onto denim, your needle snaps.
You are not the only one who has ever tried to attach a patch to a glove, only for the needle to be damaged, stitches to miss, or the machine to be injured.
It’s not hard. You need to understand how leather behaves and how to sew it properly. Let’s walk through everything in simple, practical steps.
Why Leather and Denim Are Hard to Sew Together
Denim is thick but flexible. It’s woven cotton. Your machine is designed to handle it. Leather is different.
Leather:
- Is not woven
- Does not stretch like fabric
- Does not self-heal when pierced
- Requires cutting, not pushing, through the surface
When you sew leather and denim together, your needle faces double resistance. If your setup isn’t right, it bends or breaks.
Thicker embossed patches, which brands use to make their designs on jeans and jackets, experience this problem. The process becomes seamless after you make adjustments to your equipment and work methods.
Start With the Right Patch
Before you even thread your machine, check your patch. Not all custom leather patches are created equal.
For easier sewing, choose:
- Medium-thickness leather
- Flexible backing
- Clean, smooth edges
- Even embossing depth
Some hat patches are thicker because they are designed to stand out. Those require extra care.
If you are ordering patches for business or branding, always ask about thickness and stitching compatibility. Thin and flexible fabric is easier for home sewing.
Tools That Prevent Needle Breakage
Well, let’s come to the most important point – tools. Needles usually break when used improperly.
1. Use a Leather Needle
This is non-negotiable. A leather needle has a sharp wedge tip. It slices through leather instead of forcing its way in.
For machines:
- Size 90/14 for medium leather
- Size 100/16 for thicker patches
For hand sewing:
- Use heavy-duty leather hand needles.
If you choose the right needle, most of your needle related issues will be resolved.
2. Choose Strong Thread
Leather is heavy. It needs a strong thread.
Use:
- Polyester thread
- Upholstery thread
- Heavy-duty topstitch thread
Avoid regular cotton thread. It can snap over time.
3. Increase Stitch Length
Short stitches create too many holes. Leather weakens when perforated too closely. Longer stitches are good for leather which is 3.5mm and 4mm.
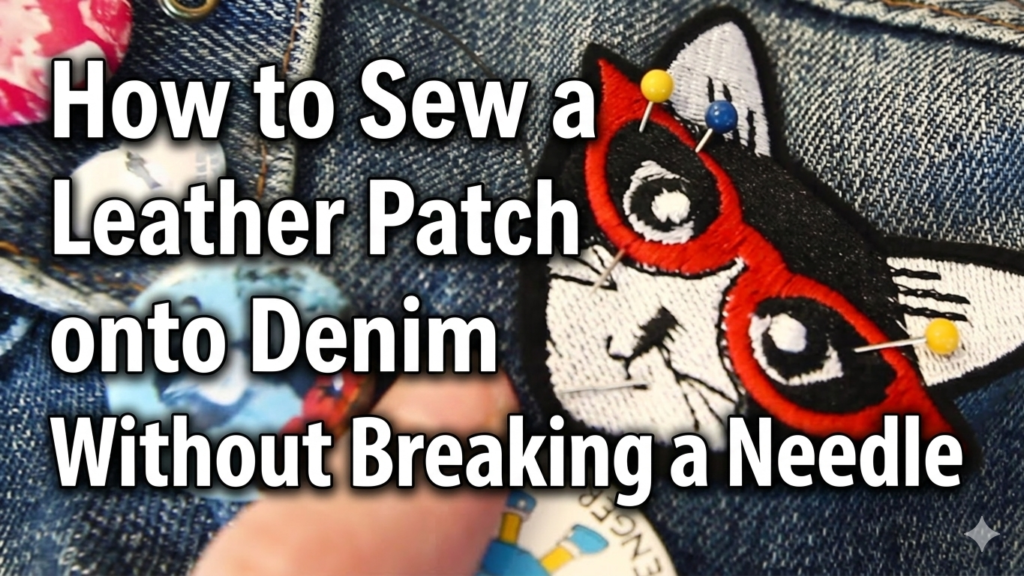
4. Avoid Pins
Pins leave permanent holes in leather.
Instead, use:
- Fabric clips
- Double-sided leather tape
- Temporary fabric adhesive
It keeps your patch secure without damage.
Step-by-Step: Sewing a Leather Patch onto Denim
Now let’s actually sew.
Step 1: Plan Placement Carefully
Leather is unforgiving. Once stitched, holes remain visible. Measure carefully. Mark lightly using tailor’s chalk.
Common placements:
- Back waistband of jeans
- Jacket chest pocket
- Sleeve detail
- Back collar area
- Front of caps
Check alignment before stitching.
Step 2: Secure Without Stress
Use clips or tape to attach the patch to the surface. The patch should be secured to the surface in a way that it remains completely horizontal. The presence of wrinkles leads to two problems because they result in stitching faults and they increase stress on the needle.
Step 3: Adjust Machine Settings
Before sewing:
- Insert a leather needle
- Increase stitch length
- Lower machine speed
- Adjust tension slightly looser if needed
Always test on scraps first. That small testing prevents big mistakes.
Step 4: Sew Slowly and Steadily
The operation requires slow movement. The needle needs to enter the material through a slow and gentle process. People should avoid both pushing and pulling the denim fabric.
If you feel resistance:
- Stop.
- Lift the presser foot.
- Reposition.
Forcing the fabric will snap the needle.
Step 5: Reinforce Corners Properly
Corners handle more stress. Instead of using heavy backstitching the correct method to finish corners requires stitch overlapping. The stitching needs to be controlled because excessive stitching should be avoided. The presence of excessive holes results in decreased strength of the leather material.
It is especially important for embossed patches, which may already have textured surfaces.
Hand Sewing Method (Safe and Reliable)
If your sewing machine struggles, hand sewing is a great option. It’s slower, but very controlled.
Here’s how:
- Mark the stitching line.
- Use a leather awl to pre-punch holes.
- Thread heavy-duty thread.
- Use the saddle stitch method.
Precutting decreases the strain on the needle and maintains straight line as possible.
- Thick patches
- Curved surfaces
- Hats
- Structured denim jackets
Professional Finish Tips
If you want your patch to look factory-made, follow these:
- Keep stitching 2–3 mm from the edge
- Use matching or contrasting topstitch thread intentionally
- Trim threads neatly
- Press denim lightly (avoid direct heat on leather)
For businesses using custom leather hat patches or denim branding, consistency matters. Clean lines. Even spacing. Balanced tension. That’s what creates a premium look.
Washing and Care After Sewing
- Leather needs care. After attaching your patch, wash inside out, use cold water, avoid bleach,
- Air dry only
- Do not iron directly over leather
A little extra special attention will keep your best embossed leather patches perfect for years to come.
Why Leather Patches Are Trending
Google trends data over the past few years shows a steady rise in searches for custom patch branding, especially among small businesses, startup apparel, and Etsy-style sellers. Small apparel brands prefer leather patches because:
- They look premium
- They elevate perceived value
- They last longer than printed labels
- They resist fading
In fact, apparel industry surveys suggest that premium finishing elements, such as leather labels, can increase perceived product value by 20–30% in consumer studies.
FAQs
Can I Sew Leather with a Denim Needle?
This is a common question. A denim needle is strong and designed for thick fabric. But leather is not fabric. While a denim needle can handle thin leather, it is not ideal for thick or embossed patches.
It may:
- Skip stitches
- Bend under pressure
- Break on thicker areas
You should purchase suitable leather needles for your leather patching work as needed. The products are budget-friendly yet offer a time-saving advantage.
Can I Use a Regular Needle to Sew Leather?
It’s possible, but risky. Regular universal needles are not designed to pierce dense material. They can:
- Snap easily
- Create uneven holes
- Damage your machine
For long-term durability and clean results, always switch to a leather needle.
How to Sew Jeans Without Breaking the Needle?
Whether you’re adding patches or repairing seams, follow these tips:
- Use a heavy-duty needle
- Slow down the machine speed
- Avoid sewing directly over thick, folded seams
- Use the hand wheel for bulky spots
- Keep fabric flat and level
You can also use a hump jumper tool to keep the presser foot level over thick seams. Most needle breaks happen at bulky seam intersections. Slow down there.
Final Thoughts
Sewing a leather patch onto denim is not complicated. But it does require patience. The right needle makes the biggest difference. Slow stitching prevents most problems. And preparation saves frustration.
Whether you’re attaching leather patches to jeans, adding patches to caps, or working with embossed patches for branding, the formula stays the same:
- Right tools.
- Slow speed.
- Steady hands.
Once you understand how leather behaves, you won’t break needles anymore. And your denim projects will look professional every time.